在 Notifcation 中接收語音輸入
編寫:wangyachen - 原文:http://developer.android.com/training/wearables/notifications/voice-input.html
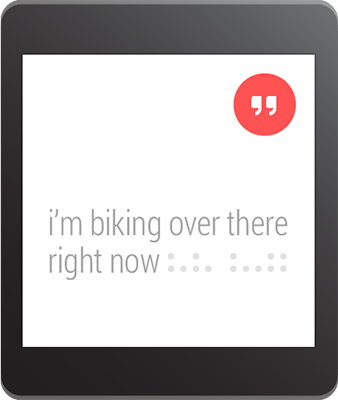
如果手持式設備上的Notification包含了一個輸入文本的action,比如回覆郵件,那麼這個action正常情況下應該會調起一個activity讓用戶進行輸入。但是,當這個action出現在可穿戴式設備上時,是沒有鍵盤可以讓用戶進行輸入的,所以開發者應該讓用戶指定一個反饋或者通過RemoteInput預先設定好文本信息。
當用戶通過語音或者選擇可見的消息進行回覆時,系統會將文本的反饋信息與開發者指定的Notification中的action中的Intent進行綁定,並且將該intent發送給手持設備中的app。
Note:Android模擬器並不支持語音輸入。如果使用可穿戴式設備的模擬器的話,可以打開AVD設置中的Hardware keyboard present,實現用打字代替語音。
定義語音輸入
為了創建一個支持語音輸入的action,需要創建一個RemoteInput.Builder的實例,將其加到Notification的action中。這個類的構造函數接受一個String類型的參數,系統用這個參數作為語音輸入的key,後面我們會用這個key來取得在手持設備中輸入的文本。
舉個例子,下面展示瞭如何創建一個RemoteInput對象,其中,該提供了一個用於提示語音輸入的自定義label。
// Key for the string that's delivered in the action's intent
private static final String EXTRA_VOICE_REPLY = "extra_voice_reply";

String replyLabel = getResources().getString(R.string.reply_label);

RemoteInput remoteInput = new RemoteInput.Builder(EXTRA_VOICE_REPLY)
        .setLabel(replyLabel)
        .build();
添加預先設定的文本反饋
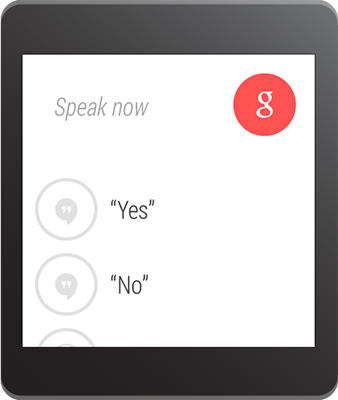
除了要打開語音輸入支持之外,開發者還可以提供多達5條的文本反饋,這樣用戶可以直接選擇實現快速回復。該功能可通過調用setChoices()並傳遞一個String數組實現。
舉個例子,可以用resource數組的方式定義這些反饋:
res/values/strings.xml
<?xml version="1.0" encoding="utf-8"?>
<resources>
    <string-array name="reply_choices">
        <item>Yes</item>
        <item>No</item>
        <item>Maybe</item>
    </string-array>
</resources>
然後,填充 String 數組,並將其添加到RemoteInput中:
public static final EXTRA_VOICE_REPLY = "extra_voice_reply";
...
String replyLabel = getResources().getString(R.string.reply_label);
String[] replyChoices = getResources().getStringArray(R.array.reply_choices);

RemoteInput remoteInput = new RemoteInput.Builder(EXTRA_VOICE_REPLY)
        .setLabel(replyLabel)
        .setChoices(replyChoices)
        .build();
添加語音輸入作為Notification的action
為了實現設置語音輸入,可以把RemoteInput對象通過addRemoteInput()設置到一個action中。然後我們可以將這個action應用到Notification中,例如:
// Create an intent for the reply action
Intent replyIntent = new Intent(this, ReplyActivity.class);
PendingIntent replyPendingIntent =
        PendingIntent.getActivity(this, 0, replyIntent,
                PendingIntent.FLAG_UPDATE_CURRENT);

// Create the reply action and add the remote input
NotificationCompat.Action action =
        new NotificationCompat.Action.Builder(R.drawable.ic_reply_icon,
                getString(R.string.label, replyPendingIntent))
                .addRemoteInput(remoteInput)
                .build();

// Build the notification and add the action via WearableExtender
Notification notification =
        new NotificationCompat.Builder(mContext)
                .setSmallIcon(R.drawable.ic_message)
                .setContentTitle(getString(R.string.title))
                .setContentText(getString(R.string.content))
                .extend(new WearableExtender().addAction(action))
                .build();

// Issue the notification
NotificationManagerCompat notificationManager =
        NotificationManagerCompat.from(mContext);
notificationManager.notify(notificationId, notification);
當程序發出這個Notification的時候,用戶在可穿戴設備上左滑便可以看到reply的按鈕。
將語音輸入轉化為String
通過調用getResultsFromIntent()方法,將返回值放在"Reply"的action指定的intent中,開發者便可以在回覆的action的intent中指定的activity裡,接收到用戶轉錄後的消息。該方法返回的是包含了文本反饋的Bundle。我們可以通過查詢Bundle中的內容來獲得這條反饋。
**Note:**請不要使用Intent.getExtras()來獲取語音輸入的結果,因為語音輸入的內容是存儲在ClipData中的。getResultsFromIntent()提供了一條很方便的途徑來接收字符數組類型的語音信息,並且不需要經過ClipData自身的調用。
下面的代碼展示了一個接收intent,並且返回語音反饋信息的方法,該方法是依據之前例子中的EXTRA_VOICE_REPLY作為key進行檢索:
/**
 * Obtain the intent that started this activity by calling
 * Activity.getIntent() and pass it into this method to
 * get the associated voice input string.
 */

private CharSequence getMessageText(Intent intent) {
    Bundle remoteInput = RemoteInput.getResultsFromIntent(intent);
        if (remoteInput != null) {
            return remoteInput.getCharSequence(EXTRA_VOICE_REPLY);
        }
    }
    return null;
}


